To remove a hard drive from a laptop, shut the laptop down fully, unplug it, then open the back panel or the small drive bay on the underside. Unscrew the bracket holding the drive, gently slide or unplug it from its connector, and lift it out. The whole job usually takes about 15 minutes and needs little more than a small screwdriver.
The one thing that trips people up is static. A tiny shock you cannot even feel can damage the electronics on a drive, so you ground yourself first and handle parts by the edges. The rest is just careful, slow movements.
People pull a drive out of a laptop for a handful of reasons. The most common is to rescue files from a laptop that no longer turns on. Others are upgrading an old spinning drive to a faster SSD, replacing a drive that has failed, or wiping storage clean before they sell or recycle the machine. Why you are doing it matters, because it changes what you should do with the drive afterward.
Is your drive even removable?
Before you touch a single screw, check what kind of storage your laptop has. Not all of it comes out. This step saves people from prying at a chip that was never meant to move.
Thin-and-light laptops, most Chromebooks, and modern MacBooks often use soldered storage. The memory chips are fixed straight onto the motherboard, so there is no drive to unscrew. MacBooks have shipped with soldered flash storage since the Retina models, and the last MacBook with a removable hard drive was sold back in 2016. Trying to force soldered storage off the board will destroy both the chip and your data.
If your storage is the removable kind, it will be one of these three shapes:
| Drive type | What it looks like | How it comes out |
| 2.5″ hard drive (HDD) | A flat metal rectangle, roughly the size of a deck of cards but thinner. Has spinning parts inside, so it feels a little heavy. | Unplug the connector or cable, unscrew the bracket, slide out. |
| 2.5″ SATA SSD | Same size and shape as the HDD above, but lighter and silent. No moving parts. | Same as the HDD: unplug, unscrew, slide out. |
| M.2 SSD | A small thin stick, a bit like a stick of gum, plugged flat into a slot on the board. | Remove one tiny screw, then pull the stick out at a slight angle. |
Not sure which you have? You can check from inside Windows before you open anything. Press the Windows key, type Defragment and Optimize Drives, and open it. The Media type column will say either “Hard disk drive” or “Solid state drive.” On a Mac, click the Apple menu, choose About This Mac, and look under Storage. If your laptop is dead and will not boot, look up the model number online and check its specifications, or open it up and read the label on the drive itself.
| Worth knowing: opening the laptop or removing the drive can void the warranty on some machines. If the laptop is new and still covered, check the terms before you start, or let the maker handle it. |
What you need before you start
This is a short list. You almost certainly have most of it already.
- A screwdriver that fits the screws on the bottom of your laptop. Most use a small Phillips head. A precision or jeweler’s set is ideal for the tiny screws.
- A small bowl or magnetic tray for the screws. They are easy to lose and there can be a dozen or more.
- An anti-static bag to hold the drive once it is out, especially if you are shipping it for data recovery.
- A clean, flat, well-lit surface. Dust and clutter are the enemy here.
An anti-static wrist strap is a nice extra but not essential for a quick job. If you do not have one, you can ground yourself by touching an unpainted metal surface for a few seconds before you handle anything, and again every few minutes. Dell’s guide to ESD precautions is a good plain-English primer if you want the full picture before you open the case.
How to remove the hard drive, step by step
These steps cover a standard 2.5-inch drive, the kind found in most older laptops. M.2 SSDs are even quicker, and there is a short version for those right after.
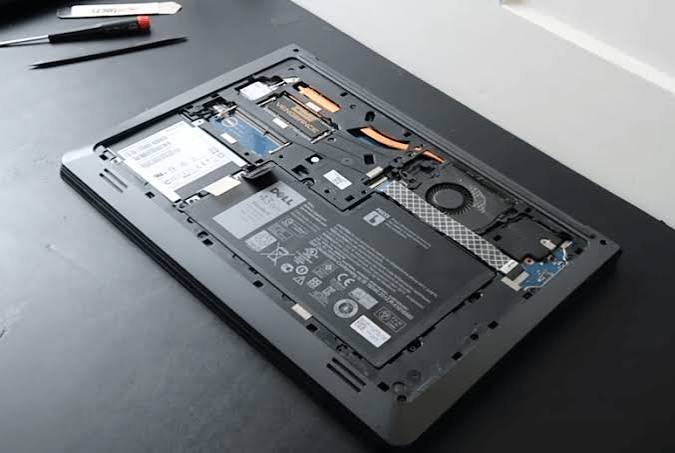
- Back up your files first, if you can. If the laptop still turns on and you care about what is on the drive, copy your files to an external drive or cloud storage before you go any further. Removing a drive does not erase it, but accidents happen, and a backup means a slip costs you nothing.
- Shut the laptop down completely. Not sleep, not hibernate. A full shutdown. Then unplug the charger and any USB cables. Working on a powered laptop risks both a shock to you and damage to the parts.
- Remove the battery if you can, then drain the power. Many older laptops have a battery that slides out with a release latch on the underside. Take it out if yours does. After that, press and hold the power button for about 15 seconds to clear any leftover charge. On sealed laptops where the battery is internal, just unplug everything and move on.
- Ground yourself. Touch an unpainted metal surface for five seconds to discharge static from your body. Put on a wrist strap now if you have one. Try to avoid working on carpet, and keep the movements small from here on.
- Open the laptop. Flip it over and look for either a small dedicated drive bay near a corner, or screws around the whole bottom panel. Some laptops give you a little hatch just for the drive; others make you take off the entire back cover. Undo the screws, set them in your tray, and lift the panel off. It may need a gentle nudge if clips hold it.
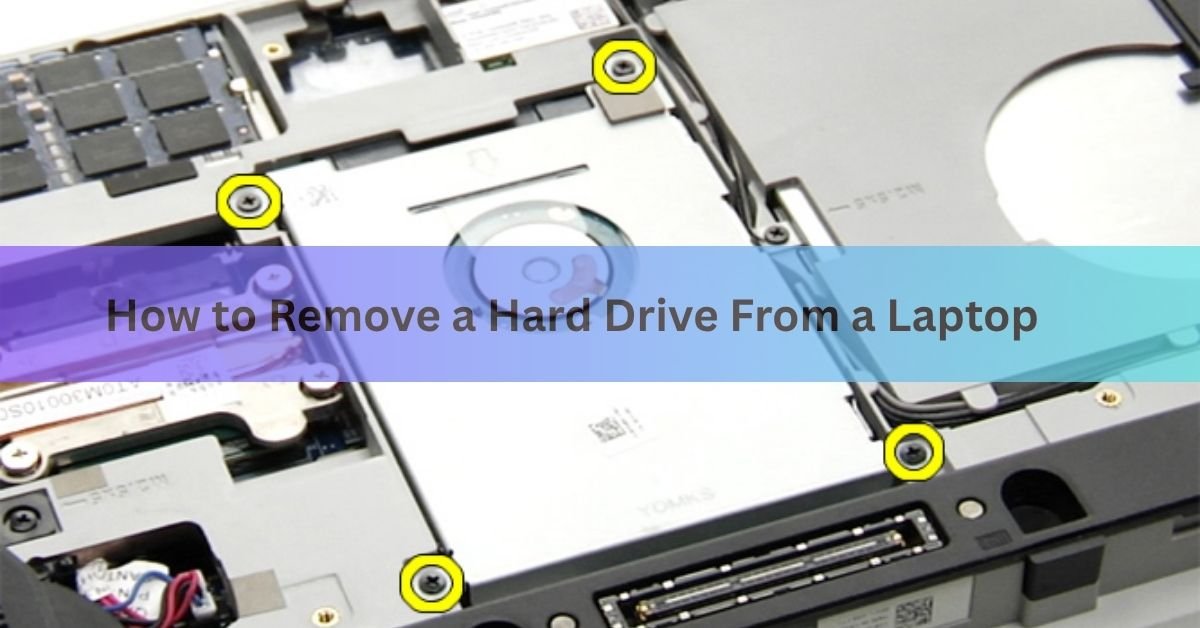
- Find the drive. It sits in a metal frame called a caddy or bracket, usually held by two to four screws. A 2.5-inch drive is a flat rectangle in a corner. If you see a small stick plugged flat into the board instead, that is an M.2 SSD, so skip to the next section.
- Unscrew the bracket. Remove the screws holding the caddy to the laptop body. Keep them separate from the case screws if you can; they are often a different size.
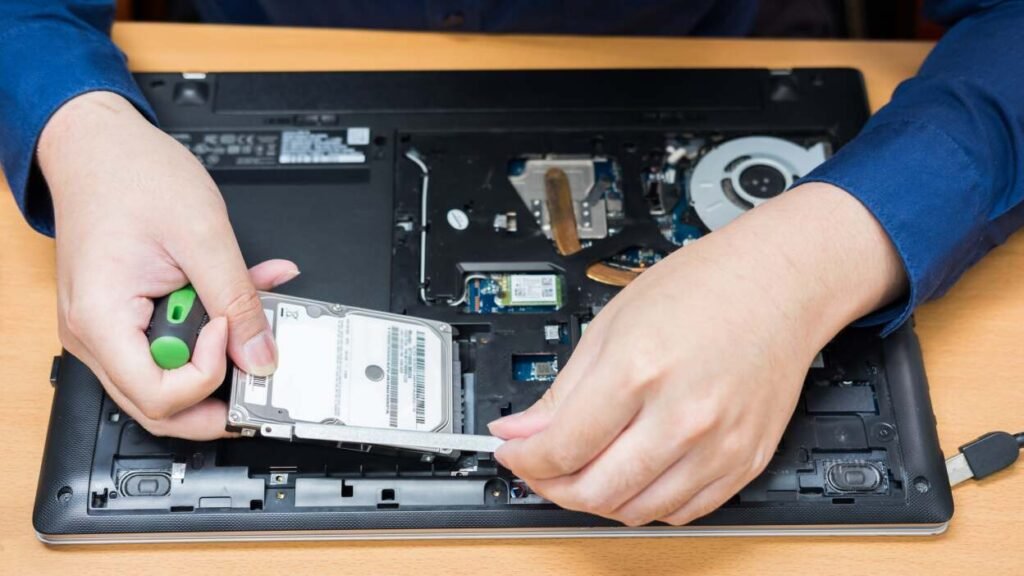
- Disconnect the drive. This is the careful part. If the drive plugs straight into a connector on the board, slide it gently away from the connector, usually toward the middle of the laptop. If it connects with a short SATA cable, pull the cable straight off the drive without wiggling it. Some drives have a small pull-tab to help.
- Lift the drive out. Once it is free, lift it out by the edges. If you need the caddy for a new drive, unscrew the four screws on the sides of the bracket to separate it from the drive. If you are only pulling the drive for data recovery, you can leave the caddy attached; it will not get in the way.
- Put it somewhere safe. Set the drive in an anti-static bag or on an anti-static surface. Do not touch the exposed circuit board or gold contacts. That is it, the drive is out.
| If the drive is clicking, grinding, or beeping, stop. Those sounds mean a mechanical fault inside a spinning drive. Every time it powers on, it can scratch the platters and lose your data for good. Do not plug it in again. Send it to a professional data recovery lab instead. |
Removing an M.2 SSD (the short version)
M.2 drives are the easiest of the lot. There is a single small screw at one end of the stick that holds it down at a slight angle. Remove that screw and the stick will pop up a little on its own. Then pull it straight out of its slot, holding it at the same gentle angle it rose to. Hold it by the edges, never the gold connector strip.
One thing to note if you are removing an M.2 drive to read its files on another computer: you will need the right kind of USB enclosure. An NVMe M.2 drive needs an NVMe enclosure, and a SATA M.2 drive needs a SATA one. They look almost identical but are not interchangeable, so check which type you have before you buy.
What to do with the drive once it is out
What comes next depends on why you pulled the drive in the first place. Here is the path for each of the common reasons.
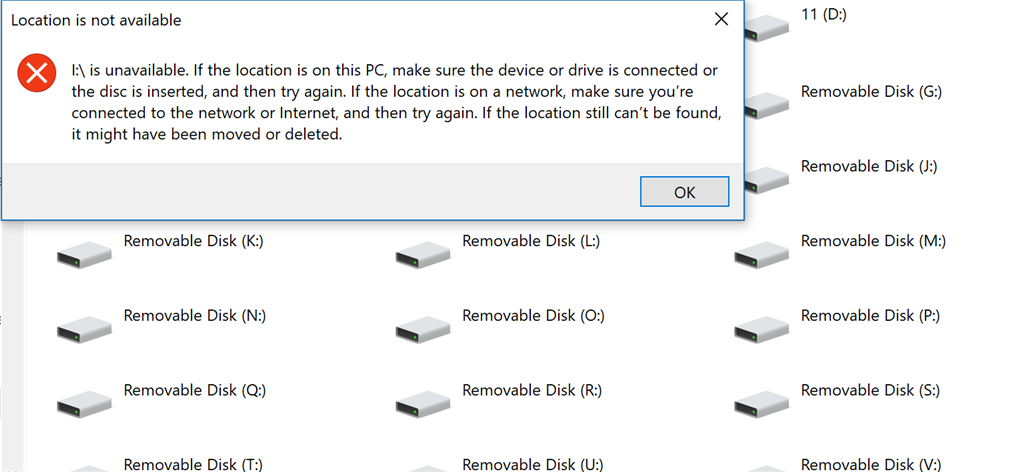
Recovering files from a dead laptop. Slot the drive into a USB enclosure or a SATA-to-USB adapter, then plug it into a working computer. In most cases the drive shows up like any external drive and you can copy your files straight off. One catch: if you are trying to recover deleted files and the drive turns out to be an SSD, your odds are lower, because a feature called TRIM may have already cleared the deleted data. On a spinning hard drive, deleted-file recovery tends to work far more often.
Upgrading to a new SSD. Before you install the new drive, think about cloning the old one onto it. Cloning copies everything, your operating system, programs, and settings included, so you do not have to reinstall Windows from scratch. Free tools like Macrium Reflect or Clonezilla handle this. Connect both drives to a computer, clone old to new, then fit the new drive into the laptop using the reverse of the steps above.
Selling, donating, or recycling the laptop. Pulling the drive does not erase it. Your files sit on that drive until they are overwritten or the drive is physically destroyed. If you are keeping the drive, wipe it with a secure-erase tool or destroy it. If the laptop used full-disk encryption like BitLocker or FileVault, the data on the removed drive is already scrambled and useless without the key, which adds a strong layer of protection. Once the drive is out and dealt with, the laptop itself holds no recoverable personal data and is safe to donate or take to a certified e-waste recycler.
Putting a drive back in, or fitting a new one, is simply these steps in reverse. Seat the drive in its connector, screw the bracket back down, replace the panel and battery, and power up. On Windows, a brand-new drive may need setting up in Disk Management before it shows up, where you initialize it and create a new volume.
Frequently asked questions
Does removing the hard drive delete my data?
No. Taking the drive out only separates it from the laptop. Your files stay on the drive until they are overwritten or the drive is physically destroyed. To truly erase data, wipe the drive with secure-erase software or destroy it.
Can I remove the hard drive while the laptop is on?
Never. Always shut the laptop down fully and unplug it first. Removing a drive from a powered laptop risks an electric shock to you and can permanently damage the drive and the laptop’s board.
Why can’t I find a removable drive in my laptop?
Many thin laptops, Chromebooks, and modern MacBooks use storage soldered directly to the motherboard. It cannot be unscrewed or swapped. If there is no drive to remove, your storage is most likely soldered, and forcing it off will destroy it.
Do I need an anti-static wrist strap?
It helps but is not essential for a quick job. If you do not have one, touch an unpainted metal surface for a few seconds to ground yourself before handling parts, do it again every few minutes, and avoid working on carpet.
How do I read the files on the drive after I remove it?
Put the drive in a USB enclosure or use a SATA-to-USB adapter, then connect it to a working computer. It usually appears like a normal external drive. For an M.2 SSD, make sure the enclosure matches your drive type, either NVMe or SATA.
Conclusion
Removing a laptop hard drive is a 15-minute job once you know your drive actually comes out. Check whether you have a removable drive or soldered storage, power down fully, ground yourself against static, then unscrew and gently unplug the drive before lifting it out by the edges. A clean removal looks like a drive sitting safely in an anti-static bag, your data intact, and the laptop ready for its next step, whether that is an upgrade, a repair, or recycling.
Related Articles:
Does a Laptop Have a Lithium Battery? What’s Inside and Why It Matters
White Spot on Laptop Screen: What It Is and How to Fix It
How to Optimize Your Gaming Laptop for 4K (Without Buying a New One)
Can You Pack a Laptop in Checked Luggage? What the Rules Actually Say
How to Work on the Couch with a Laptop Comfortably
Acer Laptop Won’t Turn On? Here’s How to Fix It (Step by Step)