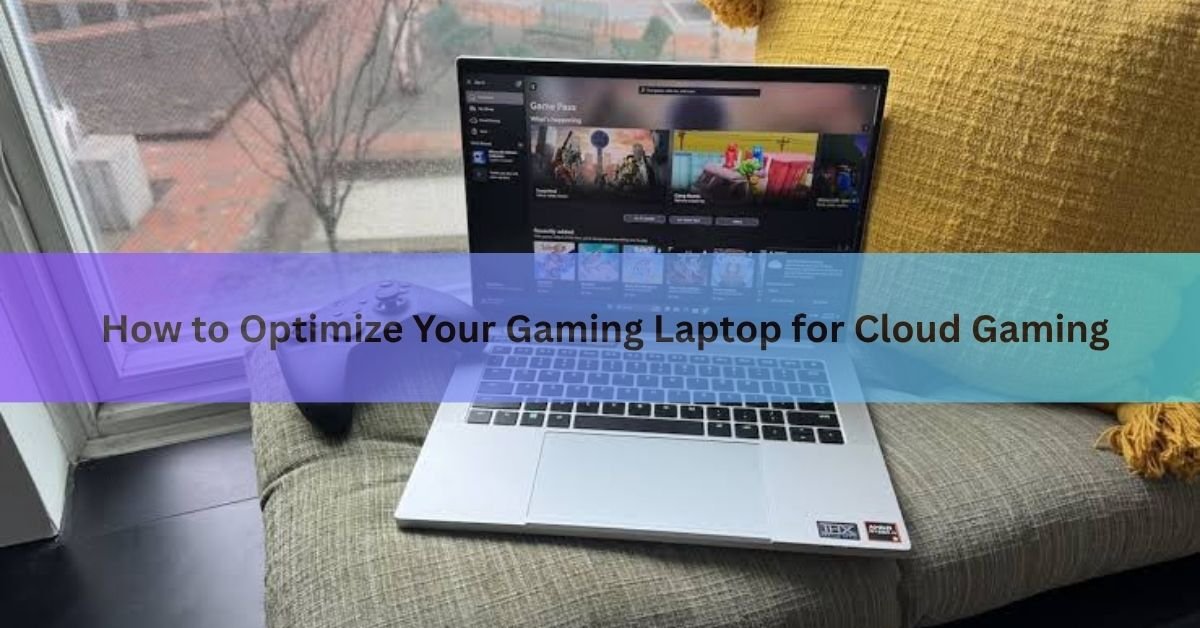
Cloud gaming moves the heavy work, rendering, physics, AI, to a data center thousands of miles away. Your laptop decodes a video stream and sends your inputs back. That sounds like it should take the pressure off your hardware entirely. In practice, a handful of settings on your laptop and your network still separate a smooth 1080p session from one that stutters every few seconds.
The good news: the fixes are mostly free and take under 30 minutes. Set your power plan correctly, tighten up your network, pick the right in-app settings, and manage your laptop’s temperature, and most lag problems disappear. This guide walks through each step in order.
Why your laptop still matters in cloud gaming
Even though the game runs on a remote server, your laptop handles three real jobs: decoding the incoming video stream at 60 or 120 frames per second, processing your mouse and keyboard inputs quickly enough to send them back with minimal delay, and staying cool enough to do both without throttling.
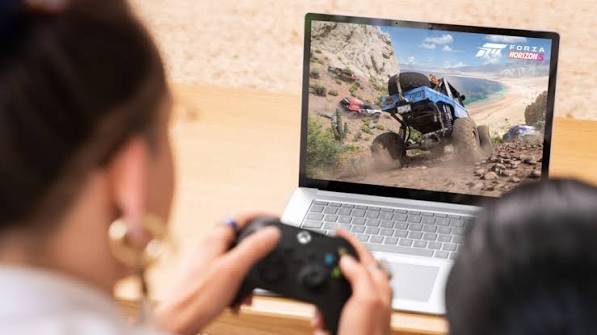
A laptop in battery-saver mode or one running 20 background apps will introduce lag that has nothing to do with your internet connection. Temperature matters too: a CPU that hits its thermal limit and drops its clock speed adds system-level latency even when the network is perfect. So the goal is a clean, cool, high-performance system that stays out of the way of the stream.
Step 1: Get your network connection right
The single most important factor in cloud gaming is not your laptop hardware, it is your connection to the server. Two numbers matter most: bandwidth (how fast data moves) and latency (how long each packet takes to arrive). A 500 Mbps connection with 90ms ping will feel worse than a 50 Mbps connection with 15ms ping.
Target numbers to aim for
| Quality | Speed needed | Latency target | Jitter target |
| 1080p / 60fps | 25 Mbps | Under 30ms | Under 10ms |
| 1080p / 120fps | 35 Mbps | Under 20ms | Under 5ms |
| 4K / 60fps | 40 Mbps | Under 30ms | Under 10ms |
| 4K / 120fps (GeForce NOW Ultimate) | 45 Mbps | Under 20ms | Under 5ms |
These figures come directly from NVIDIA’s official GeForce NOW system requirements, which are among the most detailed published by any cloud gaming service and closely match what Xbox Cloud Gaming and Amazon Luna need in practice.
Use a wired connection whenever possible
Ethernet cuts jitter and packet loss far more reliably than Wi-Fi. A wired gigabit connection will produce consistently lower ping than wireless, even on a modern Wi-Fi 6 router, because it removes signal interference and the radio congestion that crops up in apartments and shared buildings.
If Ethernet is not practical, connect to the 5 GHz band on your router rather than 2.4 GHz. The 5 GHz band has shorter range but far less interference from neighboring devices. Keep your laptop within one room of the router if you go wireless.
| Tip: Run the built-in network test inside your cloud gaming app before adjusting anything else. GeForce NOW and Xbox Cloud Gaming both test the path to their actual servers, which may differ from a generic speed test result at sites like speedtest.net. |
Enable Quality of Service on your router
QoS (Quality of Service) tells your router to prioritize certain traffic. Log into your router admin panel (usually at 192.168.1.1 or 192.168.0.1), find the QoS or traffic priority settings, and set your gaming laptop’s IP address as high priority. This makes a noticeable difference when someone else on the same network is streaming video or downloading large files.
Choose the closest server region
Every major cloud gaming platform lets you pick or auto-detect a server region. The closer that server is to your physical location, the lower your ping. In GeForce NOW, go to Settings and look for the location selector. In Xbox Cloud Gaming, the app picks automatically, but you can test different regions using a VPN to compare. A server 500 miles away will almost always beat one 3,000 miles away by 30ms or more.
Step 2: Set your Windows power and system settings
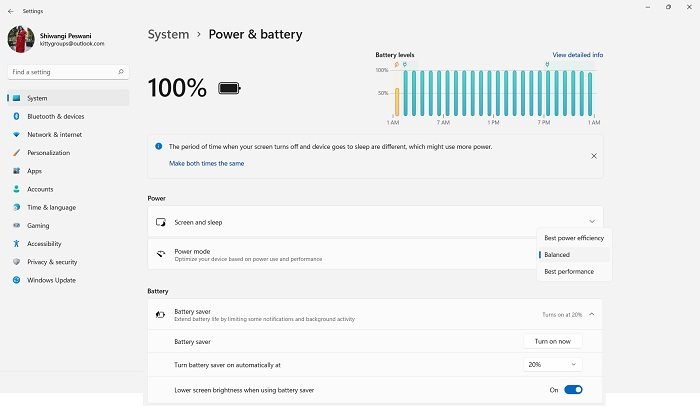
Windows defaults to balanced power mode on laptops to save battery. That is exactly wrong for cloud gaming. Balanced mode throttles your CPU when it thinks demand is low, which adds inconsistent latency spikes to the stream decoder.
Switch to High Performance mode
Go to Settings > System > Power & battery > Power mode and select Best performance. Or open Control Panel, search for Power Options, and choose the High Performance plan. If you see an Ultimate Performance option (available on Windows 11 Pro and some gaming laptops), use that instead.
Keep your laptop plugged into power while gaming. Battery-powered sessions often override the power plan with reduced CPU speeds regardless of what mode you have selected.
Turn on Windows Game Mode
Go to Settings > Gaming > Game Mode and switch it on. Game Mode does not magically boost frame rates, but it does block Windows Update from installing updates or restarting during your session, and it slightly adjusts CPU scheduling to give active game apps more processor time. The latency benefit is small, but it costs nothing and has no real downside on modern hardware.
Fix your network adapter’s power settings
This one is easy to miss. Windows can turn off your network adapter to save power, which causes brief connection drops and latency spikes even in the middle of a game.
To disable it: open Device Manager, expand Network adapters, right-click your Ethernet or Wi-Fi adapter, select Properties, go to the Power Management tab, and uncheck Allow the computer to turn off this device to save power. Click OK and you are done.
Disable Energy-Efficient Ethernet
Still in Device Manager, right-click your adapter and choose Properties, then the Advanced tab. Find Energy-Efficient Ethernet (sometimes listed as Green Ethernet or EEE) and set it to Disabled. This feature reduces power consumption by throttling the adapter during idle moments, which introduces micro-latency spikes in a gaming session.
Switch to a faster DNS server
Your ISP’s default DNS server is often not the fastest option. Switching to Cloudflare (1.1.1.1) or Google (8.8.8.8) can reduce the time it takes to connect to game servers and resolve updates. Go to Control Panel > Network and Sharing Center > Change adapter settings, right-click your active connection, select Properties, then Internet Protocol Version 4 (TCP/IPv4), and enter your preferred DNS manually.
Step 3: Tune your display and refresh rate
Cloud gaming streams frames to your screen at a specific frame rate, and your display settings need to match. A mismatch between your monitor’s refresh rate and the stream’s frame rate causes stuttering that looks exactly like a network problem but is not.
Set your display refresh rate correctly
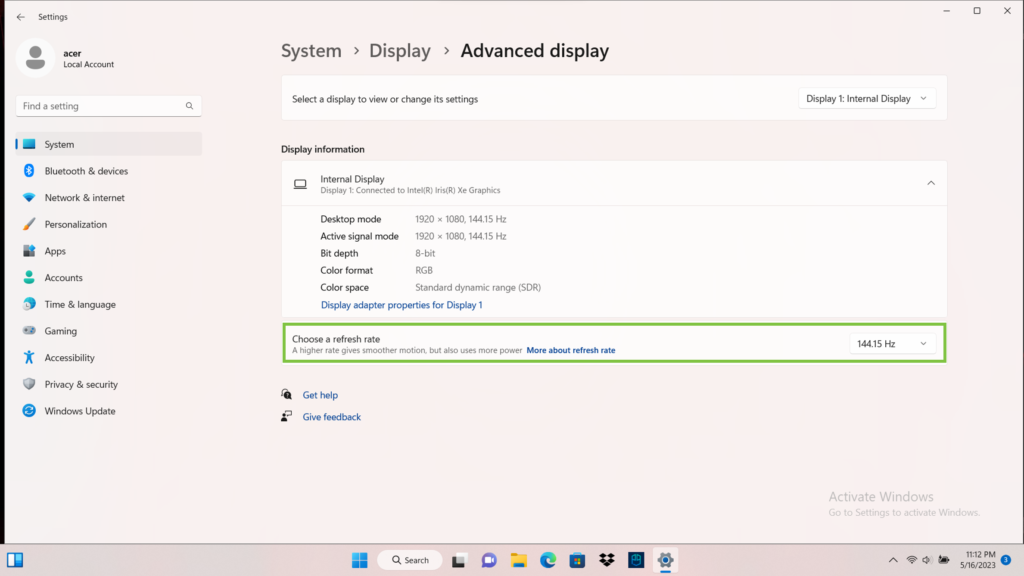
Right-click the desktop, open Display settings, scroll to Advanced display, and set your refresh rate to match what your cloud gaming subscription supports. If you have a 144 Hz panel and a GeForce NOW Priority or Ultimate subscription, set it to 120 Hz or 144 Hz. If you are on a free tier limited to 60fps, set 60 Hz to avoid any conversion overhead.
Disable V-Sync in-app when possible
V-Sync synchronizes the stream output to your display refresh, which sounds helpful but adds input lag. Most cloud gaming platforms, including GeForce NOW, let you turn off V-Sync in their streaming settings. Turn it off unless you see heavy screen tearing. If tearing bothers you and your laptop supports it, enable G-Sync or FreeSync instead, which reduces tearing without the latency penalty.
Step 4: Choose the right in-app settings for your platform
Each cloud gaming service has its own settings panel, and the defaults are not always optimal. A few minutes here can cut perceived lag more than any Windows tweak.
GeForce NOW
Open the GeForce NOW app and go to Settings > Streaming Quality. If you are on Ultimate, switch the streaming mode to Competitive for the lowest possible latency. This mode activates NVIDIA Reflex integration across supported titles, reducing the time between your mouse click and the on-screen response. Enable NVIDIA Reflex inside any game that lists it as an option in its settings menu.
For the codec setting, prefer AV1 if your laptop has a GPU from 2021 or later (NVIDIA RTX 30 series, AMD RX 6000 series, or Intel Arc). AV1 delivers the same visual quality as H.264 at roughly half the bandwidth, which means your stream stays sharper on a congested connection. If you are not sure which codec your hardware supports, leave it on Auto.
Xbox Cloud Gaming
Xbox Cloud Gaming auto-selects most settings, but you can improve your experience by using the dedicated Xbox app on Windows rather than a browser. The app supports higher bitrates and more consistent performance than the browser version. Make sure your Xbox controller is connected via USB rather than Bluetooth to cut another 5 to 10ms of input latency.
Amazon Luna
Luna works well in a browser but performs more consistently through the Luna desktop app. Use the controller option that connects directly over Wi-Fi if you have a Luna Controller, as this routes input through the cloud server rather than through your laptop, saving measurable latency in fast-paced games.
| Quick reference: GeForce NOW > enable Competitive mode and Reflex. Xbox Cloud Gaming > use the Windows app and a USB-connected controller. Amazon Luna > use the desktop app. |
Step 5: Keep your laptop cool
This step gets skipped in most cloud gaming guides because the assumption is that your laptop is doing less work. But decoding a 1080p or 4K video stream at 60 to 120 fps is genuinely demanding. A CPU running hot will thermal-throttle (automatically reduce its clock speed to protect itself), and that throttle shows up as sudden lag spikes even on a perfect network.
Switch on your laptop’s performance or turbo mode
Almost every gaming laptop has companion software that controls fan speed and thermal limits. ASUS laptops use Armory Crate, Lenovo Legion uses Lenovo Vantage, MSI laptops use MSI Center, and HP Omen laptops use OMEN Gaming Hub. Open whichever applies to you and switch the thermal profile to Performance or Turbo. This raises the fan speed early and keeps the CPU and GPU from throttling before temperatures climb too high.
Use a hard, flat surface
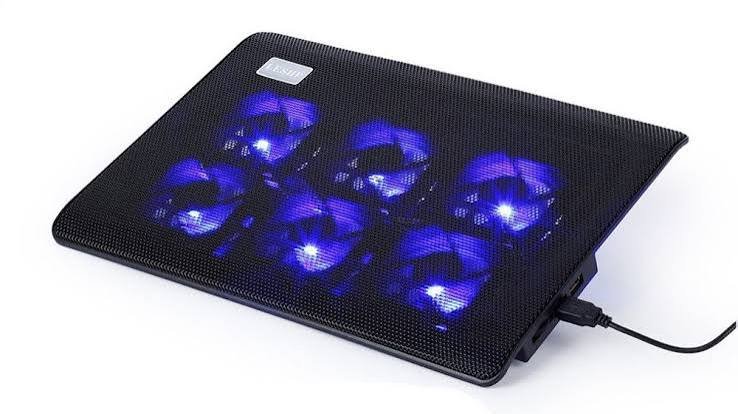
Gaming on a bed, couch, or pillow blocks the intake vents on the bottom of your laptop. A hard desk with the laptop elevated slightly (a cheap laptop stand works well) can drop temperatures by 5 to 10 degrees Celsius and prevent thermal throttling during long sessions.
Clean out the vents every few months
Dust buildup is the leading cause of thermal throttling in laptops that are more than a year old. A can of compressed air aimed at the vents for 30 seconds every three to six months keeps airflow where it needs to be. If temperatures remain above 90 degrees Celsius after cleaning, it may be time to replace the thermal paste on the CPU and GPU die, which is a slightly more involved process but can recover 10 to 20 degrees.
Step 6: Cut background apps and keep drivers current
Background applications eat two things you cannot spare in cloud gaming: bandwidth and CPU cycles. Both translate directly into lag.
Close what you don’t need before gaming
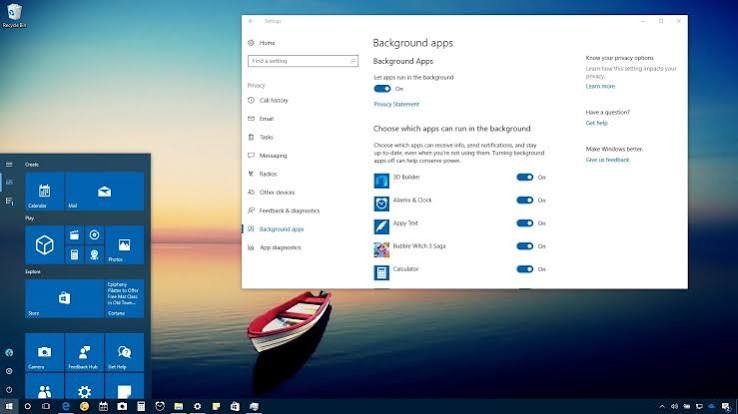
Open Task Manager (Ctrl + Shift + Esc), click the Network column to sort by bandwidth usage, and close anything consuming data. Common culprits are OneDrive, Dropbox, Google Drive, Steam downloading updates, and the Xbox app syncing saves. Browser tabs that auto-play video are particularly aggressive. Close the browser entirely or at least those tabs.
Pause Windows Update sync
Windows Update can start downloading in the background mid-session with no warning. Go to Settings > Windows Update > Advanced options and set Active hours to cover your gaming window. This tells Windows not to pull updates or restart during that period.
Update GPU drivers and your cloud gaming app
New GPU drivers often include decode optimizations specifically for AV1 and H.265, the codecs that cloud gaming platforms favor. Outdated drivers mean your GPU may fall back to software decoding, which uses significantly more CPU. Update through your GPU manufacturer’s app (GeForce Experience for NVIDIA, Adrenalin for AMD) and keep your cloud gaming client current as well.
Frequently asked questions
Do I need a fast gaming laptop for cloud gaming?
Not particularly. The GPU inside the server does the rendering. Your laptop only needs to decode the video stream, which any mid-range gaming laptop from the last five years can do without breaking a sweat. What matters far more is your network connection and your system settings.
What internet speed is the minimum for smooth cloud gaming?
25 Mbps is enough for stable 1080p at 60fps. The more important number is ping: keep it under 30ms and jitter under 10ms, and a 25 Mbps connection will feel smoother than a 200 Mbps connection with 70ms ping.
Why does cloud gaming still lag even with fast Wi-Fi?
Wi-Fi adds latency and packet loss that raw speed tests don’t reveal. The signal competes with other devices and neighboring networks, causing brief interruptions that show up as input lag or video stuttering. A wired Ethernet cable almost always solves this, even if your Wi-Fi speed test looks fine.
Should I use a browser or the desktop app for cloud gaming?
Use the dedicated desktop app whenever one is available. Apps support higher bitrates, better codec options (including AV1), and more persistent settings than browsers. Browsers are a convenient fallback, but the app consistently performs better.
Does cloud gaming reduce the strain on my gaming laptop?
For rendering and GPU load, yes. You won’t hear the fans spin to maximum like they do running a local AAA title. But decoding a 1080p stream at 120fps still uses meaningful CPU and GPU resources, and if the laptop throttles thermally, you will feel it as lag. Keeping the laptop cool still matters.
Conclusion
Optimizing your gaming laptop for cloud gaming is mostly about removing bottlenecks: a slow or wireless connection, a throttled CPU, background apps stealing bandwidth, and a thermal system that slows down mid-session. Plug in Ethernet if you can, switch to High Performance power mode, disable adapter power-saving, pick the server region closest to you, and set your in-app codec to AV1 on modern hardware. Do those five things and the vast majority of stutter, lag, and input delay problems resolve themselves.
Related Post
Acer Laptop Screen Not Working? Fix It Step by Step
How to Connect a Canon Printer to a Laptop
Can You Bring a Laptop on a Plane? Yes — Here’s What to Know
Acer Laptop Won’t Turn On? Here’s How to Fix It (Step by Step)