You can only replace a laptop CPU if the chip sits in a socket, and most laptops built after 2015 do not have one. On newer machines the processor is soldered straight onto the motherboard, so the only real path to a faster chip is swapping the whole board. On older laptops with a socketed processor, the job is very doable at home with a screwdriver, some thermal paste, and about an hour of patience.
This guide covers both halves of the problem. First, how to find out in five minutes whether your laptop qualifies at all. Second, exactly how to pick a compatible chip and do the swap safely if it does.
Can your laptop CPU actually be replaced?
Laptop processors are mounted in one of two ways, and the mounting type decides everything.
A soldered CPU uses BGA mounting, short for Ball Grid Array. Hundreds of tiny solder balls fuse the chip permanently to the motherboard. Removing it needs industrial rework equipment, a donor chip, and skills that very few repair shops have. For any normal owner, a BGA chip is not replaceable. Almost every laptop sold in the last ten years is built this way, including all thin ultrabooks, all MacBooks, and nearly all gaming laptops.
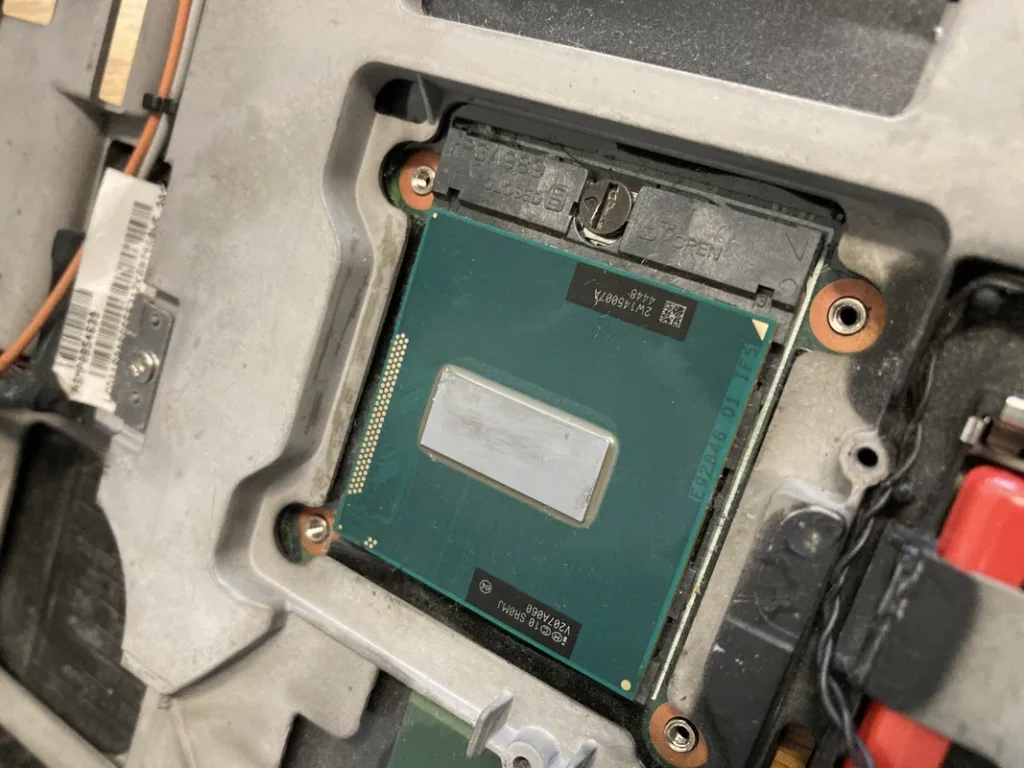
A socketed CPU uses PGA mounting, short for Pin Grid Array. The chip has pins on its underside that drop into a socket, and a single locking screw holds it in place. Turn the screw, lift the chip out, drop a new one in. Intel shipped its last socketed laptop processors with the 4th generation Core family in 2013 and 2014, so socketed machines mostly date from about 2008 to 2015. Think ThinkPad T420, Dell Latitude E6440, HP EliteBook 8470p, and similar business laptops of that era.
There is one small exception. A handful of huge desktop replacement laptops, mainly Clevo chassis and machines like the Alienware Area-51m, were built around full desktop LGA sockets and take regular desktop CPUs. These are rare, and if you own one you almost certainly already know.
Checking your own laptop takes a few minutes. The fastest way is the free CPU-Z tool. Run it, open the CPU tab, and read the Package field. Something like Socket 988B rPGA means your chip is socketed and can be swapped. Anything starting with BGA means it is soldered and this guide ends here for you. You can double check by searching your exact processor model on Intel’s ARK database, which lists the package type for every chip, or by downloading the service manual for your laptop model.
Here is the difference at a glance.
| Socketed (PGA / LGA) | Soldered (BGA) | |
| How it is attached | Pins drop into a socket with a locking screw | Fused to the board with solder balls |
| Replaceable at home | Yes, with basic tools | No |
| Typical laptops | Business and mainstream models from about 2008 to 2015 | Nearly everything made after 2015, all ultrabooks and MacBooks |
| CPU-Z Package reads | Socket … rPGA (or LGA) | BGA followed by a number |
Which CPUs will work as a replacement?
Finding a chip that physically fits is easy. Finding one that actually boots is where most swaps go wrong. A compatible replacement has to clear four checks.
The safest shortcut is to copy your own laptop’s spec sheet. Nearly every socketed-era laptop shipped in several configurations, from a base Celeron or i3 up to a quad-core i7. Any CPU that your exact model was sold with is guaranteed to work, because the manufacturer already validated the BIOS, the chipset, and the cooling for it. Search your model number plus the word specifications, note the top processor option, and buy that chip used. Old socketed mobile i7 chips are cheap now, usually between 15 and 40 dollars on the used market, which is what makes this upgrade worth doing at all.
If you want to go beyond the factory options, all four of these rules still apply:
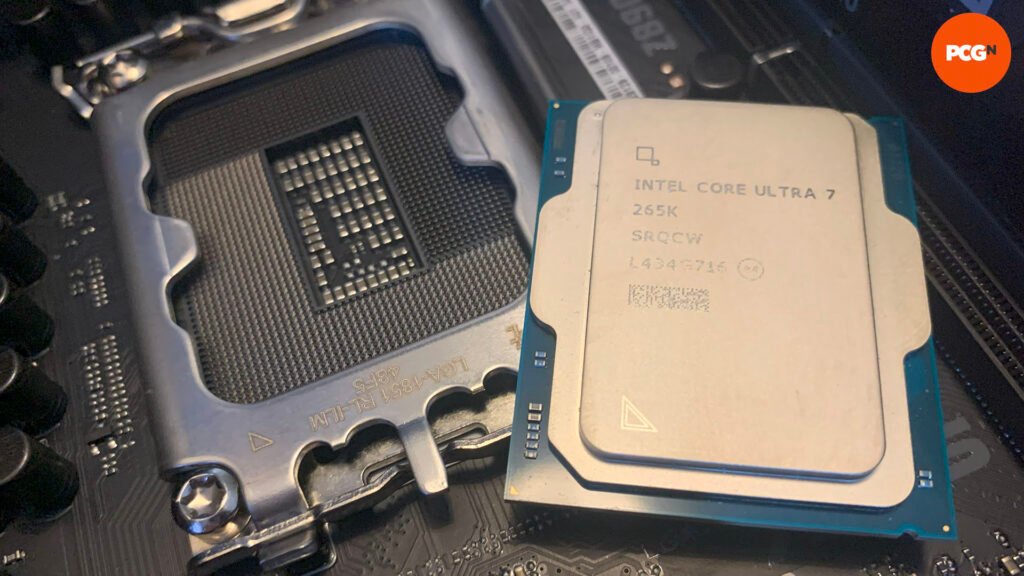
- Same socket. Socket G2 (rPGA988B) takes 2nd and 3rd generation Intel Core chips. Socket G3 (rPGA946B/947) takes 4th generation. The pins are keyed differently between sockets, so a wrong-socket chip will not even seat.
- Supported by the chipset and BIOS. The socket is only the physical connector. Your motherboard’s chipset and BIOS firmware must recognize the chip, or the laptop will not boot. This is why staying inside your model’s own CPU list is so much safer than chasing the fastest chip the socket can hold.
- Matching TDP. TDP is the chip’s heat output in watts. A laptop built for a 35 W dual-core cannot cool a 45 W or 55 W quad-core properly. Match the wattage of your original chip, or at most step up only if your model also shipped with the hotter chip from the factory.
- Same brand and platform. An Intel board takes Intel chips only, and the same goes for AMD. There is no crossover, ever.
What you need before you start
Gather everything before you open the case. Stopping mid-job with a heatsink off is how dust and mistakes get in.
- The replacement CPU, checked against the rules above
- A precision Phillips screwdriver set (#0 and #00 cover most laptops)
- A tube of thermal paste (any well known brand is fine)
- Isopropyl alcohol, 90 percent or stronger, plus a lint-free cloth or coffee filter
- A thin plastic pry tool or an old plastic card for clips
- A sheet of paper or small cups to keep screws sorted by step
- Your laptop’s service manual, found by searching the model number plus service manual
Update the BIOS before you touch a single screw. Manufacturers added support for newer chips through BIOS updates, and a CPU your firmware does not know will leave the laptop completely unable to boot. Install the latest BIOS from your manufacturer’s support page while the old CPU is still in place.
Also back up your files first. The risk is small, but you are disassembling the machine, and it costs nothing to be covered. Taking a phone photo at each stage of teardown makes reassembly far easier.
How to replace the laptop CPU, step by step
Set aside about an hour and work on a clear, well lit table. Intel publishes its own guidance on laptop processor upgrades and recommends confirming support with your laptop maker first, which is exactly what the BIOS and spec-sheet checks above accomplish.
- Update the BIOS. Flash the newest BIOS from your manufacturer’s support site, then shut down fully.
- Cut all power. Unplug the charger, remove the battery if it is external, and hold the power button for 15 seconds to drain leftover charge. Touch a metal object or wear an antistatic strap before handling parts.
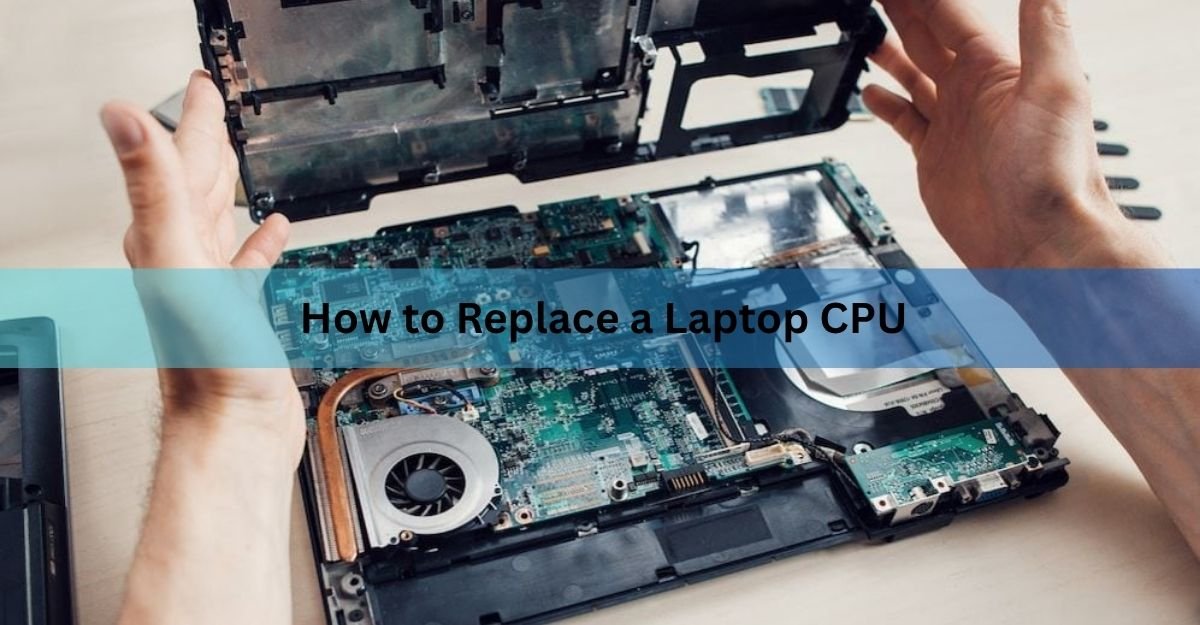
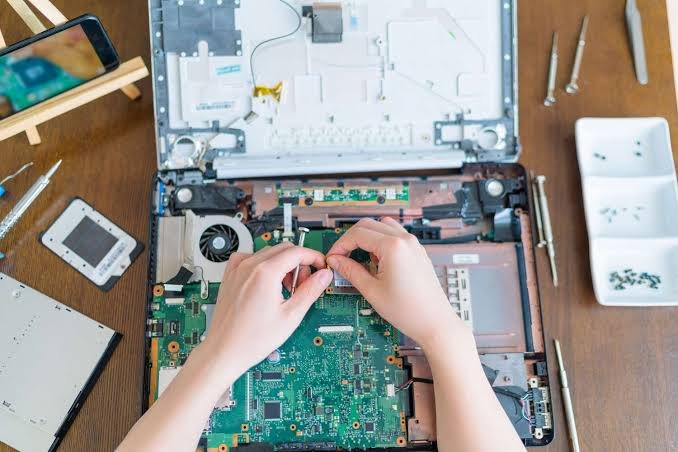
- Open the case. Open the case following your service manual. On most socketed-era laptops the CPU sits under the keyboard or the bottom panel, beneath the cooling assembly. Keep screws sorted by step.
- Remove the cooling assembly. Remove the cooling assembly. Unplug the fan cable from the motherboard, then loosen the heatsink screws. Most heatsinks have numbers stamped next to the screws; loosen them in reverse number order, a turn or two each, going around gradually so the mount comes off evenly. Lift the heatsink straight up.
- Unlock the socket. Unlock the socket. Find the flathead locking screw on the socket’s edge and turn it counterclockwise about half a turn until it stops. Some designs use a small lever bar instead.
- Remove the old chip. Lift the old CPU straight up and out. Hold it by the edges and never touch the pins.
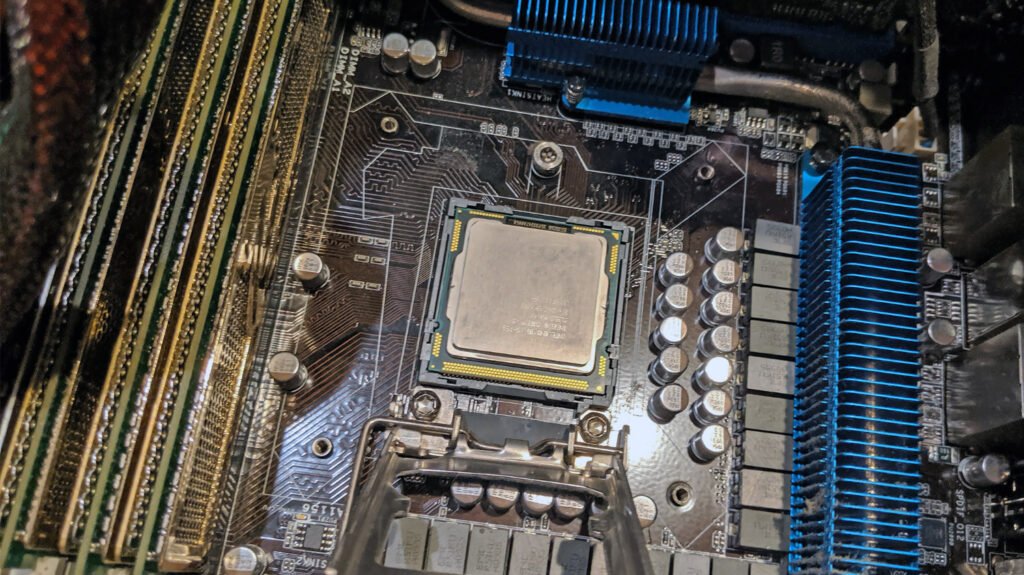
- Seat the new CPU. Seat the new CPU. Match the gold triangle on one corner of the chip to the triangle marked on the socket, then let it drop in under its own weight. A correctly aligned chip needs zero force. If it feels like it wants a push, it is misaligned, so lift it and try again. Forcing it bends pins.
- Lock the socket. Lock the socket by turning the screw clockwise until it stops.
- Clean and repaste. Clean and repaste. Wipe every trace of old paste off the heatsink plate with alcohol and the cloth. If your new chip is used, clean its top too. Once dry, put a dot of fresh paste the size of a grain of rice in the center of the CPU. The heatsink pressure spreads it on its own.
- Refit the heatsink. Reinstall the heatsink, tightening the screws in ascending number order, gradually and evenly. Plug the fan cable back in. This cable is the single most forgotten step in the whole job.
- Reassemble and verify. Reassemble, then boot straight into the BIOS setup screen. Confirm the new processor’s model name and speed are shown correctly before loading Windows.
What to check after the swap
A successful swap shows up in three places. The BIOS reports the right model and clock speed. Windows shows the new chip under Task Manager’s Performance tab. And temperatures stay sane: roughly 35 to 50 degrees Celsius at idle, and staying clearly below 90 degrees under heavy load. A free monitor like Core Temp or HWMonitor will show this in real time. High temperatures right after a swap almost always mean the heatsink is uneven or the fan cable is unplugged, not a bad chip.
If the laptop powers on but shows a black screen, work through the short list: reseat the CPU and check the socket lock, confirm the fan cable is connected, and reflash or reset the BIOS. If nothing helps, put the original CPU back. If the machine boots again, the new chip is either faulty or not supported by your firmware, and that tells you exactly where the problem is.
When replacing the CPU is not worth it
Be honest about the payoff before spending anything. Three situations make this upgrade a bad deal.
If your CPU is soldered, a shop-level motherboard swap usually costs more than a used laptop that is already faster. Put the money there instead.
If your bottleneck is not the CPU, the swap will disappoint you. A laptop that feels slow opening apps and files is usually starved by an old hard drive or too little memory. Moving from a hard drive to an SSD is the single biggest speed change most old laptops can get, and 8 GB or more of RAM keeps browsers from choking. Both upgrades are cheaper and easier than a CPU swap and work on soldered machines too.
And even a perfect swap has a ceiling. The best chip a socketed laptop can take is from the same era, so a 2013 quad-core i7 is a big jump over a 2013 dual-core i3, but it still trails any modern budget processor. The upgrade makes sense as a cheap way to stretch a working machine another year or two, not as a substitute for a newer laptop.
Frequently asked questions
How do I know if my laptop CPU is soldered or socketed?
Run the free CPU-Z tool and read the Package field on the CPU tab. A PGA package (for example Socket 988B rPGA) is socketed and replaceable. Any BGA package is soldered to the motherboard and cannot be swapped at home.
Can I upgrade my laptop from an i5 to an i7?
Yes, if the CPU is socketed and the i7 uses the same socket, generation, and wattage. The safest choice is an i7 your exact laptop model was sold with from the factory, since the BIOS and cooling already support it.
Can I put a desktop CPU in a laptop?
No. Laptop and desktop chips use different sockets and power levels. The only exceptions are a few rare desktop replacement laptops, such as certain Clevo and Alienware Area-51m models, that were built around desktop LGA sockets.
Do I need new thermal paste when replacing a laptop CPU?
Yes, every time the heatsink comes off. Clean all old paste from the heatsink and chip with 90 percent isopropyl alcohol, let it dry, then apply a rice grain sized dot of fresh paste to the center of the CPU.
Why won’t my laptop boot after a CPU swap?
The usual causes are a BIOS that does not support the new chip, a misseated CPU, or a forgotten fan cable. Reseat the chip and check the cable first. If it still fails, refit the original CPU to confirm the new chip is the problem.
Conclusion
Check the package type first, because that one fact decides everything: a PGA socketed chip can be swapped, a BGA soldered chip cannot. If yours is socketed, update the BIOS, buy the best CPU your exact model shipped with, swap it with fresh thermal paste, and confirm the new chip in the BIOS on first boot. Done right, a 20 dollar used chip can noticeably extend the life of an old laptop.
Related Post:
How to Reset a Gateway Laptop to Factory Settings
How to Restore a Toshiba Satellite Laptop to Factory Settings
Can I Pack a Laptop in My Checked Luggage?